Articles
Recording first guitar tracks in Reaper with ESI UGM96
Of course the first thing to do is to install the newest drivers from ESI website.
If your Reaper looks differently than show below, click Options > Themes > Default_3.0.
1) Configure UGM96 ASIO buffer setting
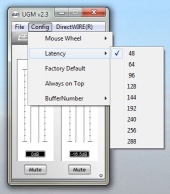
Don't start Reaper yet. Open ESI configuration windows by clicking ESI icon in system tray:
It's safe to start with buffer size of 128 samples as it guarantees decent feel for most parts and isn't too much demanding on CPU.
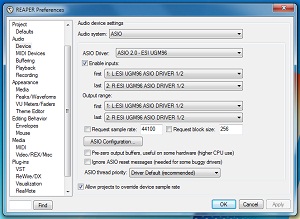
2) Select UGM96 ASIO driver in Reaper configuration
Reaper: Options > Preferences > Audio > Device > Audio system: ASIO, ASIO Driver: ASIO 2.0 - ESI UGM96
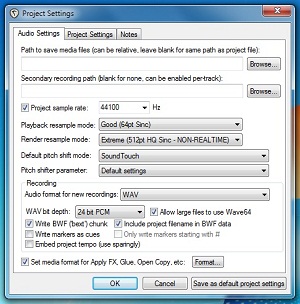
3) Set project sample rate and recording bit depth
Reaper: File > Project settings > Audio Settings > Project sample rate: 44100, Recording > Record format: WAV, WAV bit depth: 24
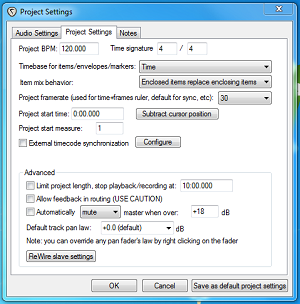
4) Set project frame rate
Reaper: File > Project settings > Project Settings > Project frame rate: 30
5) Create a new track
Reaper: Track > Insert a new track (ctrl+t)
6) Insert FX on the created track
Reaper: left click "fx" button on the created track:
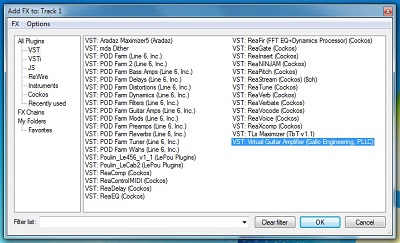
Select Virtual Guitar Amplifier (Gallo Engineering, PLLC) from the list:
7) Turn on record monitoring for the created track
Left click on speaker button on the track so it is filled like presented below.
Reaper's Record Monitoring button
8) Arm the track for recording
Left click on "ar" labeled button on the track so it lits up. You should be able to hear your guitar playing through Reaper at this point, in case you don't change the input to "Send 2".
Reaper's Record Arm/Disarm button
9) Select input for the created track
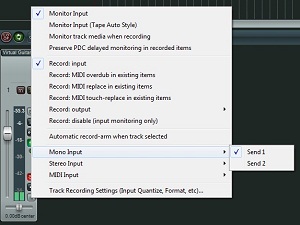
Left click on the "in" button on the created track, select one of two mono inputs available. In case the guitar is connected to the guitar only input "Send 1" should be the one.
10) Record
Left click record button on transport bar (it's the red one).


